Listen to this article
Best Ways to Record College Lectures for Accurate Transcripts and Notes
The best way to record college lectures for notes is to get permission first, choose a reliable recording device, place it close to the professor, and reduce background noise before class begins. Record in a widely supported format such as M4A, MP3, or WAV, then verify that the file saved correctly. A clear recording can be uploaded to AI Study Assistant to generate a transcript, summary, organized notes, flashcards, and practice quizzes for later review.
Key takeaways
- Ask the professor for permission and review your college’s recording policy before capturing any lecture.
- Place your phone or recorder near the professor and away from doors, fans, projectors, and student conversations.
- Run a short test recording before class, confirm that the microphone is unobstructed, and keep the device powered throughout the lecture.
- Use a supported audio format such as M4A, MP3, or WAV, and preserve the original file until processing is complete.
- Upload a clear lecture recording to AI Study Assistant to create a transcript, notes, summaries, flashcards, and quizzes from your class material.
Before Class: Permission and Recording Checklist
Start by confirming that recording is allowed. Ask your professor directly, check the syllabus, and review applicable college policies. Some instructors permit audio recording for personal study but prohibit sharing, publishing, or recording student discussions. Students with approved accommodations should follow the process established by their accessibility office. Use this pre-class checklist: – Obtain permission before recording. – Ask whether discussions, presentations, or sensitive material should be excluded. – Confirm that the recording will remain private and be used only for studying. – Charge your phone, tablet, laptop, or dedicated recorder. – Free enough storage for the entire lecture. – Enable Do Not Disturb or airplane mode when appropriate so calls do not interrupt the recording. – Bring a charging cable, power bank, or spare batteries. – Test the recording app and microphone before class. – Create a consistent filename, such as `BIO101_2026-03-12_Cell-Division.m4a`. Permission to attend a class does not automatically mean permission to record or distribute it. Never upload or share a recording publicly unless everyone whose voice or work appears in it has authorized that use.
Choose the Right Class Recording Setup
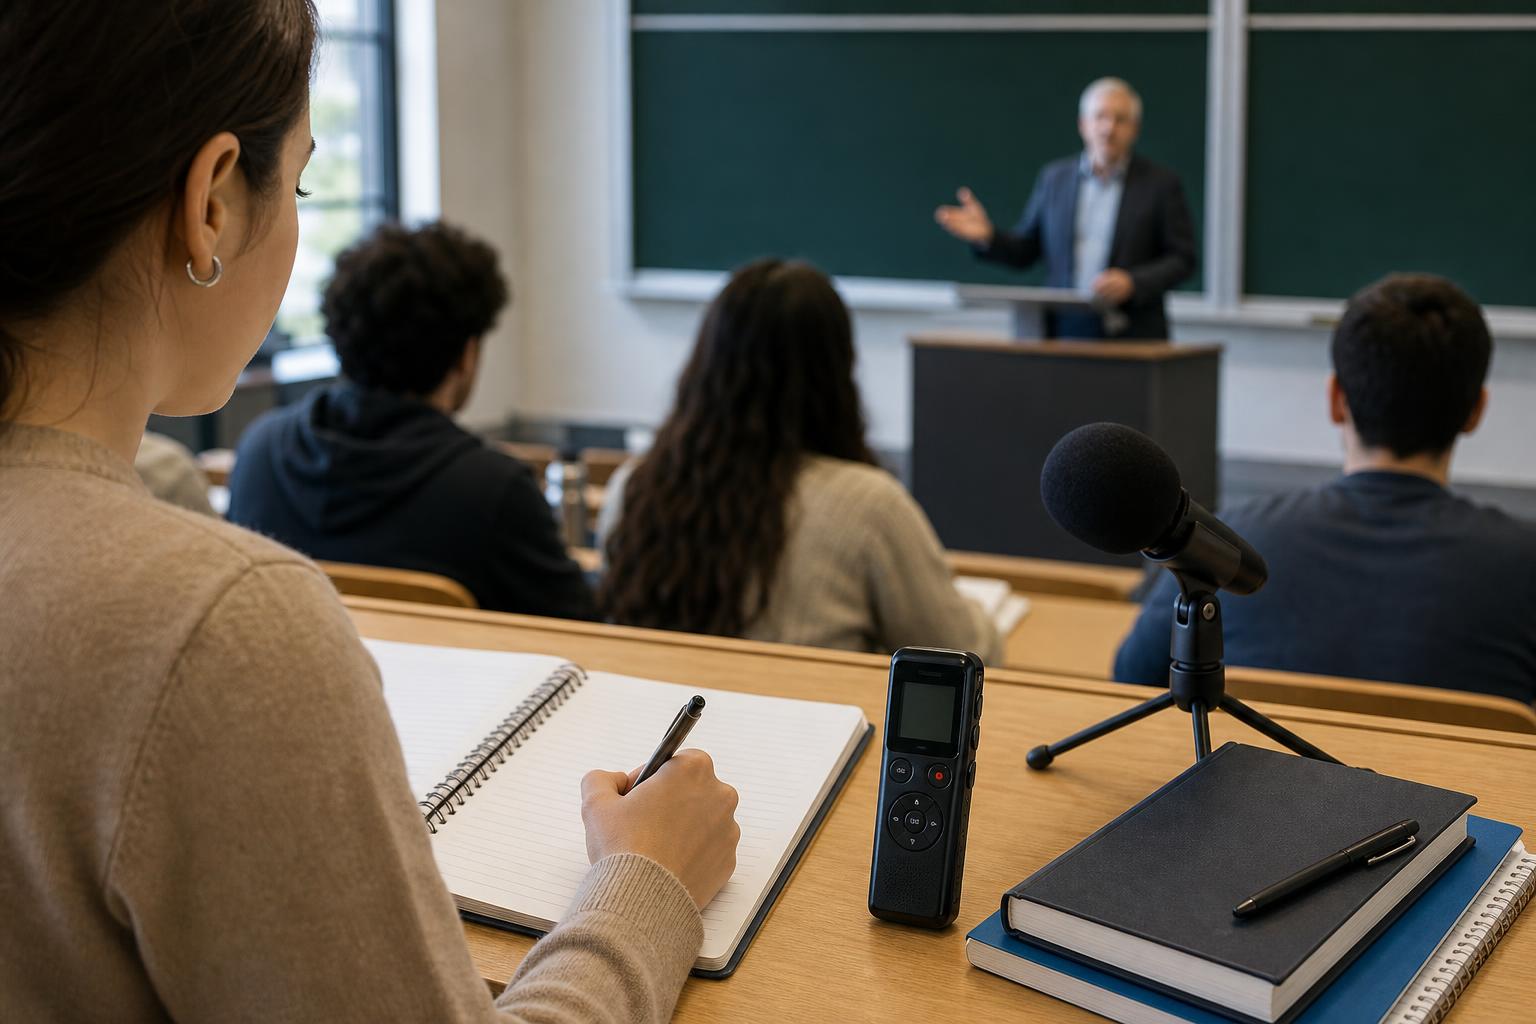
For most students, a modern smartphone with a dependable voice-recording app is the simplest setup. A dedicated digital recorder may offer longer battery life, physical controls, and better microphones. A laptop can work, but keyboard noise, fan noise, and the distance from the professor may reduce clarity. Recommended setup options: – **Smartphone:** Best for convenience. Use the built-in recorder or a trusted lecture recording app for students, and keep the microphone uncovered. – **Dedicated audio recorder:** Useful for long classes, strong battery life, and more control over recording quality. – **External microphone:** Helpful in large lecture halls if the microphone is compatible with your device and can be positioned legally and safely. – **Laptop:** Suitable when it must remain open for class, but avoid typing directly beside its microphone. Select a quality setting that balances clarity and file size. M4A and MP3 are compact and convenient for spoken lectures. WAV preserves more audio detail but creates much larger files. If your app offers mono or stereo recording, mono is usually sufficient for one professor speaking from the front of the room.
During Class: How to Record Lectures Clearly
Device placement usually matters more than buying expensive equipment. Sit near the front or center and place the recorder on a stable, vibration-free surface with its microphone aimed toward the professor. Keep it away from bags, papers, laptop fans, HVAC vents, doors, projectors, and classmates who may talk or type loudly. Follow this in-class checklist: – Arrive early and capture a 10–15 second test. – Listen through headphones to confirm that speech is understandable. – Position the device as close to the professor as permission and classroom rules allow. – Do not cover the microphone with a case, clothing, notebook, or hand. – Avoid moving or tapping the device during recording. – Note important timestamps, such as “24:10—exam example” or “41:30—assignment instructions.” – If you must ask a question, speak clearly enough for your own voice to be captured. – Check discreetly during a transition to confirm that recording is still active. – Keep taking brief notes instead of relying entirely on the audio. In a large room, front-row placement can dramatically improve the signal-to-noise ratio. If the professor uses a classroom microphone, choose a seat near a speaker only if the sound remains clear and does not become distorted.
After Class: Save, Review, and Prepare the File
Stop the recording after the lecture and immediately verify that the file opens, has the expected duration, and includes audible speech. Rename it with the course, date, and topic, then back it up to an approved cloud drive or another secure location. Keep the original audio until you have reviewed the generated transcript and notes. Post-class checklist: – Play the beginning, middle, and end of the recording. – Confirm the full lecture was captured. – Rename the file consistently. – Back up the original before editing or compressing it. – Trim only irrelevant audio recorded before or after class. – Avoid aggressive noise removal, which can damage speech. – Use M4A, MP3, or WAV when possible. – Split unusually long files only if an upload limit requires it. – Preserve chronological order when uploading multiple parts. If speech is quiet, mild volume normalization may help. However, processing cannot fully restore words masked by conversation, clipping, or heavy background noise. Capturing clean audio at the source remains the best strategy for accurate transcription.
Upload the Lecture to AI Study Assistant
Once the recording is saved, upload it to AI Study Assistant for processing. The app can turn lesson and lecture audio into a transcript, summary, structured notes, flashcards, and practice quizzes. Use a descriptive course title and date so the generated materials are easy to find later. For better results: – Upload the clearest original or lightly processed file. – Add the course name, lecture topic, and date when organizing the session. – Review specialized names, formulas, acronyms, and technical vocabulary in the transcript. – Compare key claims with your slides, textbook, and handwritten notes. – Correct transcript errors before using exact wording in an assignment. – Convert the lecture into flashcards and a quiz soon after class while the context is fresh. – Return to difficult timestamps if a generated note seems incomplete. Automated transcripts are study aids, not guaranteed verbatim records. Professors’ accents, overlapping speech, poor microphone placement, and discipline-specific terminology can affect accuracy, so human review remains important.
Quick Troubleshooting Guide
If the transcript contains frequent mistakes, diagnose the recording before repeating the workflow. Muffled audio usually means the microphone was covered or too far from the speaker. Distorted audio may result from placing the device too close to a loud speaker. Repeated background words often come from nearby conversations, while gaps can indicate low storage, battery failure, or an interrupted app. Try these fixes for the next class: – Move closer to the professor. – Place the device on a stable surface instead of inside a bag. – Turn off notification sounds and vibration. – Choose a quieter seat away from doors and vents. – Test a different recording-quality setting. – Use an external microphone if the room is consistently difficult. – Ask whether the professor can provide slides, terminology lists, or an approved recording. – Keep brief written notes as a backup and mark moments that need clarification.
Flashcards
What should a student do before recording a college lecture?
Ask the professor for permission and check the syllabus, college policy, and any applicable accessibility rules.
Where should a recording device be placed in a lecture hall?
Place it on a stable surface near the professor, with the microphone unobstructed and away from noise sources.
Why should you make a test recording before class?
A test confirms that the microphone works, speech is audible, the app is configured correctly, and storage is available.
Which audio formats are commonly suitable for lecture transcription?
M4A, MP3, and WAV are commonly suitable; M4A and MP3 are smaller, while WAV generally preserves more audio detail.
What causes muffled lecture audio?
Common causes include covering the microphone, placing the device inside a bag, or sitting too far from the professor.
Why should the original lecture recording be preserved?
The original provides a backup if editing damages the audio or the transcript must be checked against the source.
How can timestamps improve lecture notes?
Timestamps mark important explanations, examples, and assignment details so students can return to the relevant audio quickly.
What can AI Study Assistant generate from a lecture recording?
It can generate a transcript, summary, organized notes, flashcards, and practice quizzes.
Why must an automated transcript be reviewed?
Accents, technical vocabulary, overlapping speech, formulas, and background noise can cause transcription errors.
What is usually the best recording mode for one professor speaking?
Mono is generally sufficient for a single speaker and can create smaller files than stereo.
Quiz
1. What is the first step before recording a college lecture?
- A. Ask the professor for permission
- B. Place the phone inside a backpack
- C. Convert the file to WAV
- D. Upload the lecture publicly
Show answer
Answer: Ask the professor for permission
Permission and institutional rules should be addressed before recording begins, especially when other students may be captured.
2. Which placement is most likely to produce a clear recording?
- A. Inside a closed bag
- B. Beside a loud ventilation fan
- C. On a stable surface near the professor
- D. At the back near the exit
Show answer
Answer: On a stable surface near the professor
Shorter distance and fewer nearby noise sources help the microphone capture the professor more clearly.
3. Which file format typically creates the largest file while preserving more audio detail?
- A. TXT
- B. JPG
- C. MP3
- D. WAV
Show answer
Answer: WAV
WAV is often uncompressed or minimally compressed, so it commonly retains more audio data and uses more storage.
4. What should you do immediately after the lecture?
- A. Delete the original recording
- B. Verify the file opens and has the expected duration
- C. Share the file with the entire class
- D. Apply aggressive noise removal
Show answer
Answer: Verify the file opens and has the expected duration
Checking the file promptly helps identify missing, corrupted, or incomplete audio while the class is still fresh in your memory.
5. Which factor is most likely to reduce transcription accuracy?
- A. Clear speech near the microphone
- B. A descriptive filename
- C. Overlapping voices and background noise
- D. A fully charged battery
Show answer
Answer: Overlapping voices and background noise
Competing sounds can mask words and make it harder for transcription software to separate the professor’s speech.
6. Why should generated lecture notes be compared with other class materials?
- A. To increase the audio file size
- B. To verify technical terms and important details
- C. To avoid organizing the lecture
- D. To make the microphone more sensitive
Show answer
Answer: To verify technical terms and important details
Slides, textbooks, and handwritten notes can help identify errors in names, formulas, acronyms, and specialized terminology.
FAQs
What is the best way to record college lectures for notes?
Get permission, sit near the professor, place a charged phone or recorder on a stable surface, run a short audio test, and minimize nearby noise. Save the lecture in M4A, MP3, or WAV format, verify the file after class, and upload it to AI Study Assistant to generate study materials.
Can I legally record my college professor?
Rules differ by instructor, institution, location, and circumstance. Ask the professor and review the syllabus and college policy before recording. If recording is part of an approved accommodation, follow the guidance from your accessibility office. Permission to record does not necessarily grant permission to share or publish the audio.
How can I improve the accuracy of a college lecture transcript?
Move the recorder closer to the professor, keep the microphone uncovered, avoid fans and conversations, use an appropriate quality setting, and preserve the original file. After transcription, review technical vocabulary, names, formulas, and passages with overlapping speech.
Is a phone good enough for recording lectures?
A modern phone is often sufficient when it is placed close to the speaker in a quiet position. A dedicated recorder or external microphone may help in large rooms, but careful placement usually matters more than expensive equipment.
Next step
Turn this lecture into a study session with notes, flashcards, and a practice quiz built from your own class recording.
Related guides
- How to record and transcribe lectures
- What to do when you miss a lecture
- Best way to study after missing a class lecture
- How to catch up on a missed class using lesson recordings
- How to take better notes from online classes and recorded lectures
- Best way to study from lecture transcripts for exams
- Lecture recording to summary app
- Osmosis and diffusion study guide

Leave a Reply